Many crafters are on the lookout for unique and adorable projects, and this Free Deer Hat Crochet Pattern is just the thing to elevate your crochet skills. You will learn to create a charming deer hat that is perfect for keeping warm while adding a touch of whimsy to your wardrobe. With simple instructions and easy-to-follow steps, you’ll be able to craft this delightful hat in no time, making it an excellent gift for friends or family. Dive into this fun pattern and let your creativity shine!
Materials Needed
Before you commence on creating your adorable deer hat, gather all the necessary materials to ensure a smooth and enjoyable crafting experience. You’ll need your chosen yarn, a crochet hook, scissors, and a tapestry needle for weaving in ends. Having everything on hand makes it easier to focus on your project without distractions.
Yarn Selection
Across various yarn options, you should choose a medium-weight yarn that is soft and comfortable against the skin. Wool or acrylic blends work well for this project, providing warmth and durability. Opt for colors that suit your style, whether you prefer natural browns or vibrant hues.
Crochet Hook and Tools
For the crochet hook, you will want to select one that matches your yarn choice; typically, a size H/8 (5 mm) works well for worsted weight yarn. In addition to your hook, having a stitch marker can help you keep track of rounds, while a pair of scissors and a tapestry needle will assist you in finishing your hat neatly.
Needed tools are vital for a seamless crochet experience. A properly sized crochet hook ensures even tension, making your stitches uniform. The tapestry needle is important for weaving in those pesky yarn ends, while scissors help keep your project tidy. Keep a stitch marker handy to avoid losing your place as you work on the rounds of your deer hat—it can save you a lot of time and frustration!
Pattern Overview
Some crocheters will find this Free Deer Hat Crochet Pattern to be an exciting project, perfect for both beginners and seasoned enthusiasts. This whimsical design features adorable deer motifs that not only keep you warm but also make a charming accessory for anyone’s winter wardrobe. The combination of simplicity and creativity ensures that you will enjoy the process and be thrilled with the final result.
Size and Fit
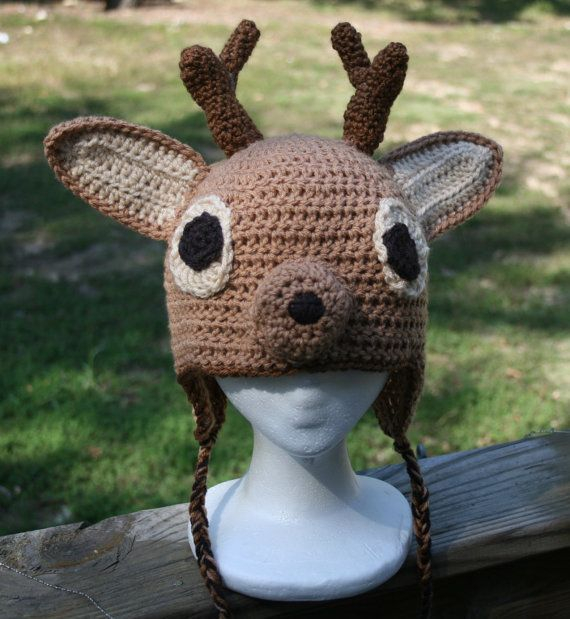
By following the instructions provided in this pattern, you will create a cozy deer hat that fits most adult head sizes. The design is slightly stretchy, allowing for a comfortable fit while still providing warmth during colder months. You can easily adjust the size by modifying the foundation chain or the number of rows, making it a versatile piece that can cater to various preferences.
Stitch Techniques
The stitch techniques used in this pattern are beginner-friendly yet offer enough variety to keep you engaged. You will utilize basic stitches such as single crochet and double crochet, alongside the slip stitch to create the hat’s shape and details. This pattern also includes color changes to bring the deer design to life. With these techniques, not only will you enhance your crochet skills, but you will also achieve a polished, professional-looking finish.
Pattern details emphasize the importance of achieving uniform tension and mastering basic stitches. You will start by creating a magic ring for a secure foundation. The combination of single and double crochet stitches allows you to construct the body of the hat while maintaining shape and structure. Be sure to practice the color-changing techniques carefully for clean edges, as they play a significant role in illustrating the deer motif beautifully. Additionally, consider using a stitch marker to track rows and avoid losing your place. This project not only enhances your crochet repertoire but also produces a delightful hat that you or someone special can enjoy!
Step-by-Step Instructions
There’s no need to feel overwhelmed! Follow these detailed instructions carefully to create your adorable deer hat.
| Section | Instructions |
|---|---|
| Ribbing Section | Begin your hat with ribbing to ensure a snug fit. |
| Main Hat Body | Construct the main body of the hat using your preferred stitch. |
| Deer Antlers and Features | Add the charming antlers and facial features for that perfect deer look. |
Ribbing Section
Around the base of your hat, you’ll start with a ribbing stitch that creates elasticity. This section typically consists of alternating single and double crochet stitches, ensuring your hat fits comfortably and securely on your head.
Main Hat Body
On top of your ribbing, you will continue with the main hat body. You can use any stitch pattern you prefer, such as half double crochet or double crochet, to build the height of the hat.
Also, ensure that you maintain consistent tension while crocheting the main body. This will provide a visually appealing finish and prevent any uneven spots, making your hat not only functional but also fashionable.
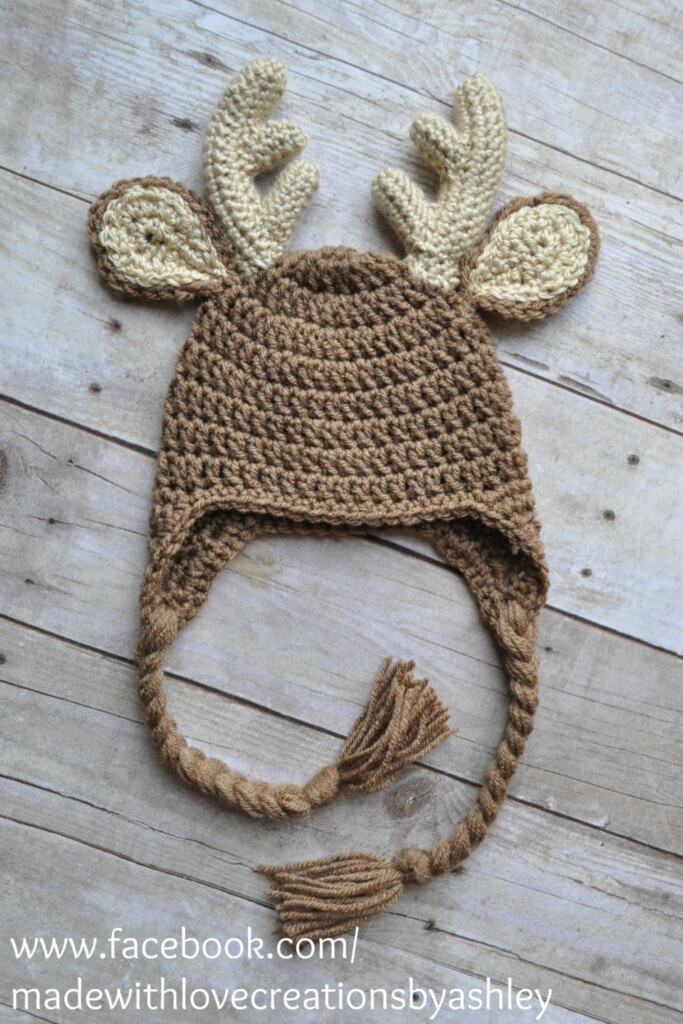
Deer Antlers and Features
An crucial part of your deer hat are the antlers and facial features. Crocheting these elements adds unique personality and charm to your creation.
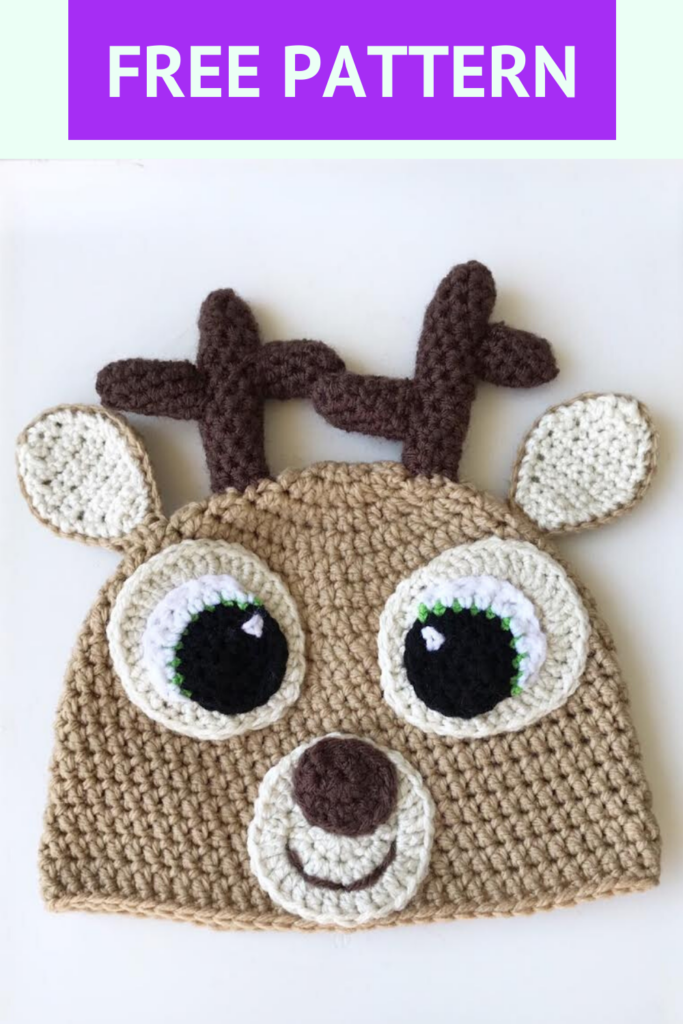
To create antlers, use a thicker yarn and make sure they’re sturdy enough to stand upright. Embellish the face with eyes and a nose, bringing your deer hat to life while ensuring all elements are securely attached for durability.
Customization Options
Many crafters enjoy personalizing their deer hats to reflect their unique style and preferences. From colors to embellishments, you can easily modify the design to suit your taste, making your crochet work truly one-of-a-kind. Explore the various options available to add a personal touch to your project!
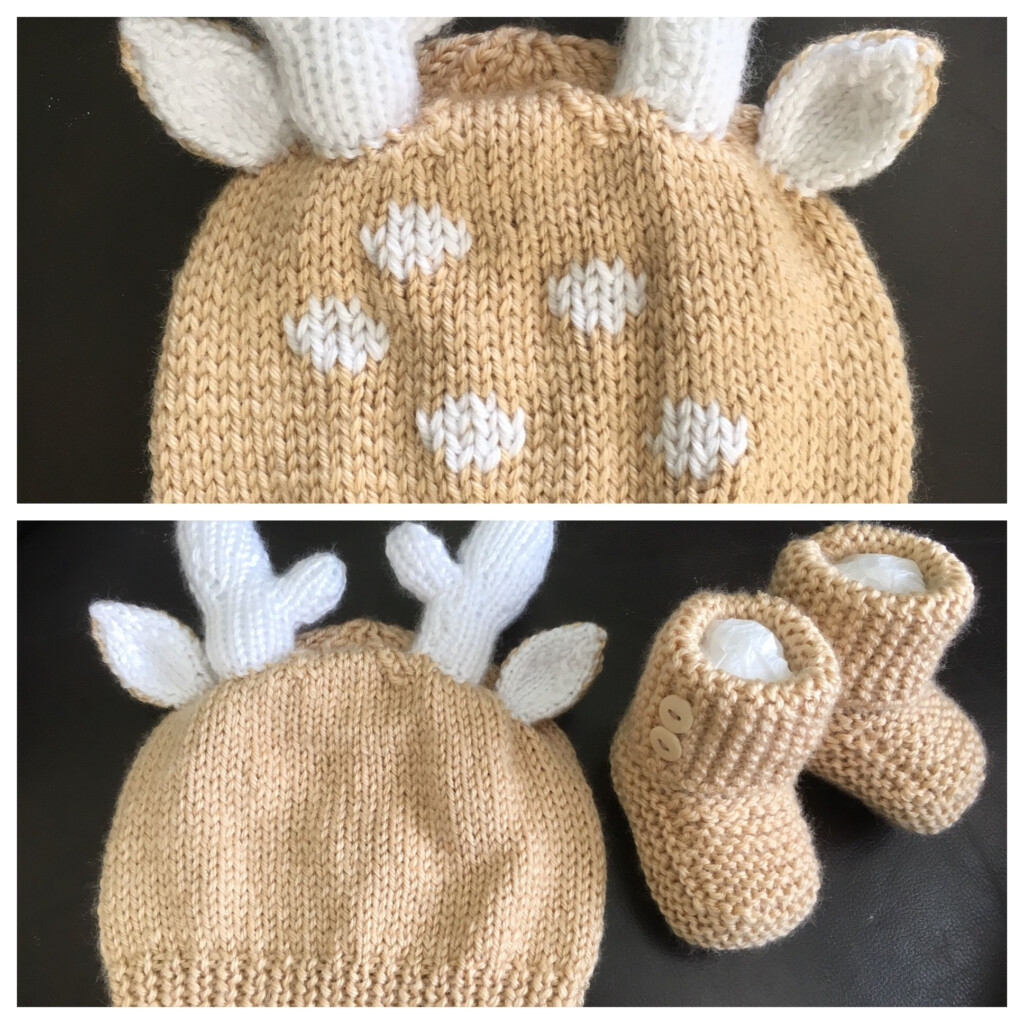
Color Variations
Below are several color combinations you can explore for your deer hat. You might opt for traditional browns and creams to mimic a natural deer, or you could experiment with vibrant hues such as bright pinks and blues for a playful twist. Your choice of colors can reflect your personality or the season, ensuring your hat stands out!
Embellishments
Above the basic design, adding embellishments can elevate your deer hat to the next level of creativity. Consider incorporating cute appliqués, buttons, or even pom-poms to enhance your piece. These additions can provide a personal flair, making your crochet project not just a hat, but a statement accessory!
This is where you can truly unleash your creativity! Adding appliqués like tiny flowers, snowflakes, or even small animals can create a fun and whimsical look. You could use colorful buttons for the eyes or as decorative elements along the brim. Don’t forget to consider fringe, ribbons, or even pompoms for the top to add a dash of flair. Embrace your imagination and let your deer hat showcase your artistic touch!
Troubleshooting Common Issues
Not all crochet projects go smoothly, and that’s perfectly okay! You might encounter various issues while crafting your deer hat, such as sizing problems or stitch miscounts. Fortunately, with some helpful tips, you can easily resolve these issues and enjoy a successful crochet experience.
Sizing Problems
Problems with sizing can arise due to gauge discrepancies or yarn choices. Ensure you are using the recommended yarn and hook size for the pattern. If your hat is too tight or too loose, you may need to adjust your tension or recheck your gauge swatch before proceeding.
Stitch Miscounts
Before diving deeper into your project, it’s important to understand how to address stitch miscounts. Keeping track of your stitches can be challenging, but it’s vital for an even and balanced design.
Issues with stitch miscounts often lead to uneven shapes or unexpected gaps. To avoid this, consider using a stitch marker to keep track of your beginning and end of rows. If you discover that you’ve miscounted, don’t panic! Simply unravel back to the last known count and proceed cautiously. Paying attention to your counts will ensure your hat turns out as beautiful as you envisioned.
Maintenance and Care
For keeping your deer hat in the best shape, regular maintenance and care are imperative. You can find the Free Crochet Pattern: Reindeer Hat helpful as you create a durable piece that you’ll love for years. Ensure to wash it gently to avoid damage while preserving the intricate details.
Washing Instructions
Behind every cozy crochet piece lies a set of washing instructions to maintain its charm. Hand wash your hat in cold water using mild detergent, and never wring or twist it. Instead, let it air dry flat to prevent any alterations in shape.
Storage Tips
An ideal storage strategy enhances your hat’s longevity. Always store your deer hat in a cool, dry place, free from direct sunlight. Consider using a dedicated storage box or a breathable bag to protect it from dust and pests. Follow these tips for optimal results:
- Choose a cool location.
- Avoid exposure to direct sunlight.
- Use breathable bags for protection.
Perceiving how you store your hat will influence its quality and appearance over time.
To wrap up
Hence, you now have all the necessary insights to create your own Free Deer Hat Crochet Pattern. This fun and engaging project not only adds a unique accessory to your wardrobe but also hones your crochet skills. Whether you’re a beginner or an experienced crocheter, following the steps will help you achieve a beautiful result. Enjoy the process, personalize your hat with colors you love, and wear it proudly as a testament to your crafting journey.
Download Free Deer Hat Crochet Pattern
To get Free Deer Hat Crochet Pattern ideas and stuff, check out the gallery of them below: