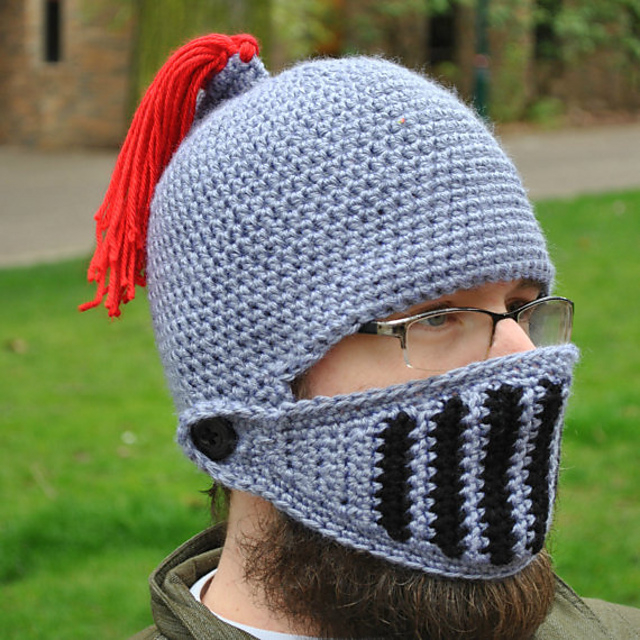
Pattern crafting a crochet knight hat can be an exciting adventure for both beginners and seasoned crocheters alike. This unique project allows you to create an enchanting accessory that’s perfect for parties, dress-up, or cozy winter warmth. With easy-to-follow instructions, you’ll be able to transform your yarn into a stylish knight hat that showcases your creativity while keeping your little ones entertained. Grab your crochet hook and let’s probe this fun and rewarding project that will surely impress everyone!
Materials Needed
While preparing to crochet your Knight Hat, ensure you have the important materials on hand. You will need yarn, a crochet hook, and some additional supplies for embellishments and finishing touches. Each component plays a role in achieving the perfect look and comfort for your hat. Gather these items before you begin to streamline your crafting process and enhance your overall experience.
Yarn Selection
Across various projects, the right yarn can make a significant difference, and this Knight Hat is no exception. Opt for a medium-weight yarn that balances durability and softness for an enjoyable wearing experience. Consider your color preferences and any additional patterns you might want to incorporate.
Hook Size
Behind every successful crochet project is the right hook size that corresponds with your chosen yarn. Using the recommended hook ensures that your stitches are uniform and the fabric maintains the desired drape. For this Knight Hat, a size H-8 (5mm) crochet hook is typically a suitable choice when working with medium-weight yarn.
But selecting a hook is about more than just size; it involves understanding the yarn weight and stitch tension. Testing a gauge swatch can help you find the perfect hook, ensuring your hat fits just right. Adjusting your hook size can also affect the hat’s overall texture—using a larger hook will create looser stitches, while a smaller hook results in tighter patterns.
Additional Supplies
Selection of extra supplies can add a personal touch to your Knight Hat project. You may want to include stitch markers, a yarn needle, safety eyes, or embellishments like feathers or badges for authentic detailing. Having these items readily available can elevate your finished product and showcase your creativity.
And while these additional supplies might not be mandatory, they greatly enhance your crafting experience. For example, stitch markers help keep track of stitches and rows, ensuring precision as you work through your pattern. Crafting the perfect Knight Hat means focusing on the small details, so don’t hesitate to experiment with various embellishments to truly make it your own.
Sizing Information
Now that you’re excited to create your knight hat, it’s vital to understand the sizing options to ensure a perfect fit. This pattern accommodates various ages and head sizes, allowing you to customize the project according to the recipient’s needs. Whether you’re crafting for a child or an adult, you can find the right dimensions to guide your crochet adventure.
Age Range
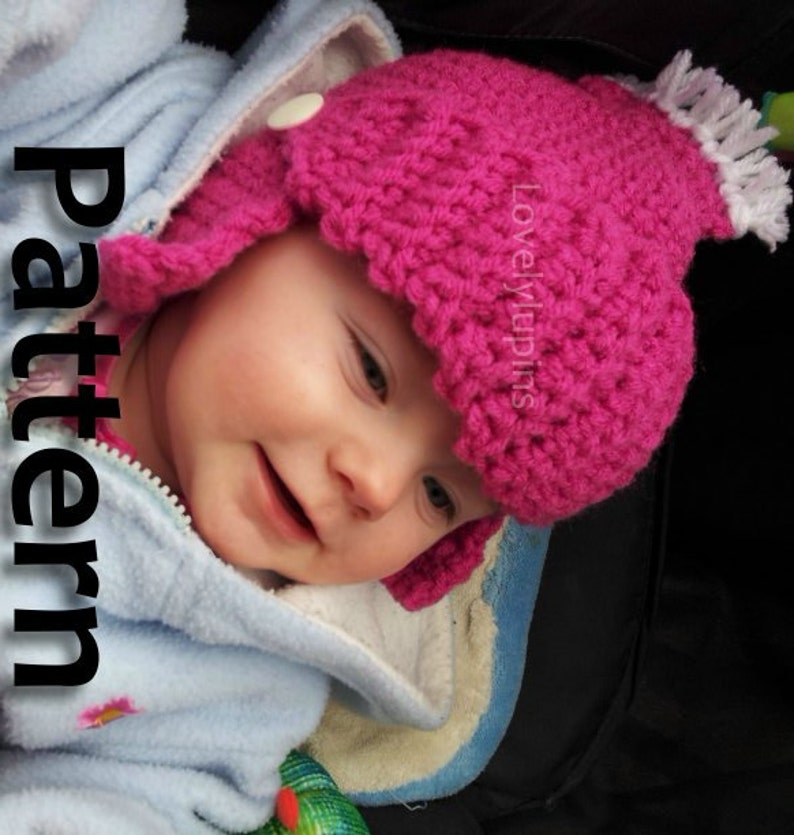
An excellent feature of this crochet knight hat pattern is its versatility across different age groups. Suitable for infants to adults, you can easily adjust the size based on the intended wearer. This makes it a fantastic gift for any occasion, ensuring that everyone can enjoy this fun and whimsical accessory.
Adjusting for Size
Before you start crocheting, take a moment to assess the size you need for your knight hat. Gathering measurements of the head circumference of your intended wearer is a helpful step in achieving the perfect fit.
Indeed, adjusting for size involves more than just measuring; you may need to alter the number of stitches or rows based on the hat size required. For smaller sizes, consider decreasing your stitch count or using a finer yarn, while larger sizes may benefit from additional stitches or a thicker yarn. By being mindful of these adjustments, your knight hat will fit beautifully and keep its charming shape without compromising comfort.
Pattern Instructions
Not only is this knight hat pattern fun to make, but it also allows you to unleash your creativity as you stitch. Follow the detailed instructions provided to craft your very own unique helmet that can be customized in various colors, making it a perfect project for both beginners and seasoned crocheters alike.
Basic Stitches
At the heart of this pattern are simple stitches like chains, single crochets, and double crochets. Familiarity with these basic techniques will help you find joy in your crochet journey as you construct the knight hat, enabling you to focus on the creative aspects instead of getting bogged down by complex methods.
Assembly Steps
With each piece completed, it’s time to bring your knight hat to life through assembly. Align the sections in the order specified in the instructions, ensuring that the seams are neat and the shape retains its form. Using a yarn needle, secure each piece together, making sure to weave in any loose ends for a polished finish.
Hence, the assembly process is an exciting part of the project where your creativity truly shines. You can adjust the fit and style by adding an inner lining or incorporating embellishments, which serves to enhance the overall character of your knight hat. Take your time here, as this step is pivotal in ensuring the hat is not only visually appealing but also comfortable for wear.
Edging Techniques
Along with the basic form of the hat, adding edging techniques will elevate your project to a professional level. A simple slip stitch or a more intricate scalloped edge can provide the finishing touches that give your knight hat a unique, handcrafted charm.
Another important aspect to consider is that the edging not only enhances the visual appeal but also reinforces the structure of the hat. You can play with contrasting yarns or textures during this final step, making it an opportunity to showcase your personal style. The right edge can transform your hat from a simple project into a standout piece that everyone will admire.
Decorative Elements
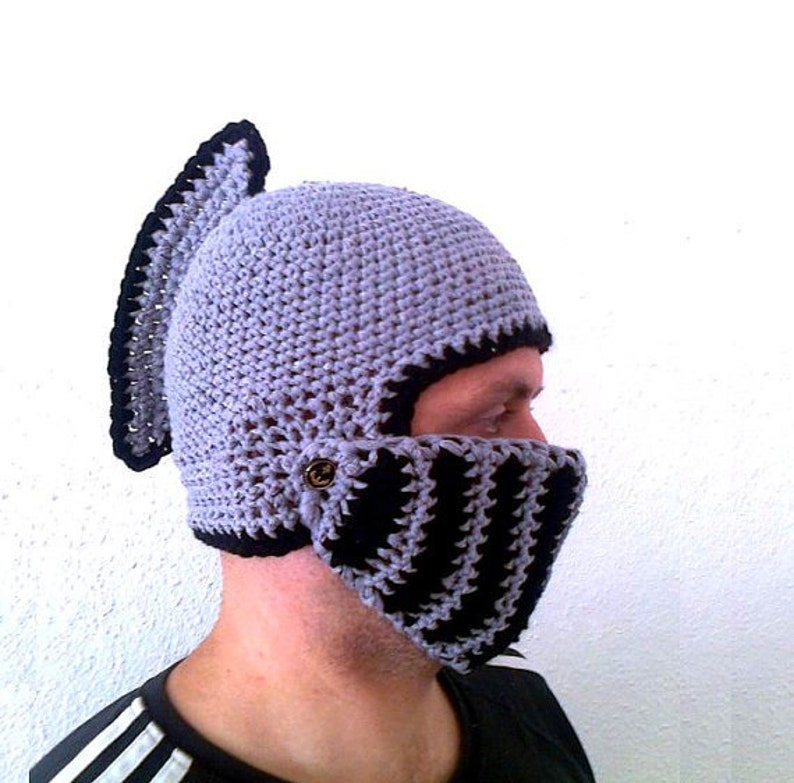
Once again, enhancing your crochet knight hat with decorative elements can bring it to life. Consider adding details that emulate armor, such as contrasting colors or textured stitches, which can make your creation stand out. You can also incorporate embellishments like small crocheted shields or even a faux plume. These additional touches will not only add character but also serve as a great conversation starter when you showcase your crochet skills.
Adding Armor Details
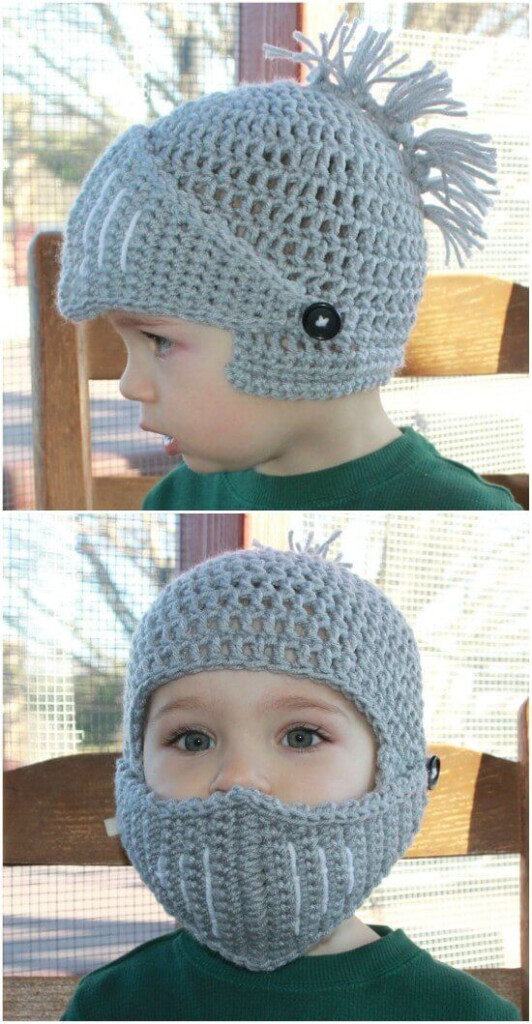
Against the backdrop of your knight hat, incorporating armor details can elevate its design significantly. You can achieve this through unique stitch patterns that mimic the appearance of metal plates or chainmail. Using yarn in shades of silver or gray will enhance the overall metal-like look. Additionally, don’t hesitate to mix various yarn types for added texture, creating a truly impressive knightly appearance.
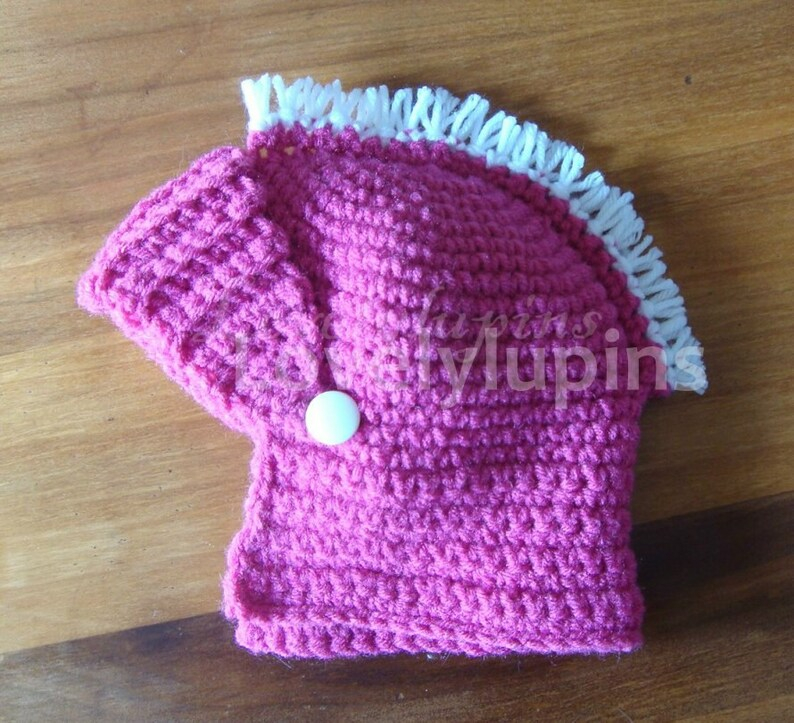
Variations and Customizations
After you’ve mastered the basic pattern, you have the freedom to create variations and customizations that reflect your personal style. From changing color schemes to experimenting with sizes, your hat can be as unique as you are. You can even add ear flaps or a cozy lining for extra warmth on chilly quests.
It is necessary to embrace your creativity when customizing your knight hat. Consider adding unique symbols or initials that represent your own ‘knightly’ persona. You might want to use specialty yarns like variegated or fuzzy options for different textures and visual effects. Each customization you make will add character and charm, transforming a simple hat into a masterpiece that showcases your individuality while celebrating the spirit of knights.
Troubleshooting Common Issues
After completing your crochet knight hat, you may encounter some common issues. It’s important to address these concerns to ensure your finished product meets your expectations. By identifying the problem areas, you can make adjustments to improve your hat, keeping it not only visually appealing but also comfortable and functional.
Stitch Count Problems
After reviewing your progress, you may find that your stitch count doesn’t match the pattern. This can happen after combining different techniques, or even a momentary distraction during your crocheting session. To resolve this issue, count your stitches regularly and compare them to the pattern. If you notice a discrepancy, carefully unravel to the first mistake and correct it before continuing.
Fit and Size Adjustments
Above all, achieving the correct fit and size for your knight hat is vital for comfort and practicality. If your hat feels too tight or too loose, you can easily make adjustments in the next iteration. Consider measuring your head circumference and adjusting the number of foundation chains or rows to create a more tailored fit. Additionally, keep in mind that yarn choice can also impact the overall size.
Issues with fit often stem from personal preference, as some may prefer a snugger fit while others enjoy a looser style. If your hat appears larger than expected, you might want to try a smaller hook size or reduce the number of stitches in your next attempt. Conversely, if it feels tight, consider increasing your stitch count or using a larger hook. Gauge swatches are also beneficial to ensure your tension aligns with the pattern requirements.
Care Instructions
Keep your crochet knight hat looking its best by following these simple care instructions. Proper maintenance not only extends the life of your creation but also helps preserve its shape and appearance for years to come.
Washing and Drying
Beside regular check-ups for dirt and wear, washing your hat is crucial for keeping it clean. Hand wash your knight hat in cold water with a gentle detergent, and avoid wringing it out to prevent deformation. Instead, lay it flat on a towel to absorb excess moisture before air-drying it in a shaded area, away from direct sunlight.
Storage Tips
Drying your hat correctly is just the beginning. For storage, ensure your hat maintains its shape and remains free of dust and pests. Store it in a cool and dry place, and consider using the following tips:
- Place the hat on a shelf or in a drawer instead of hanging it.
- Use a hat box or breathable garment bag for extra protection.
- Avoid stacking items on top to maintain its form.
This will help keep your knight hat in excellent condition for your next adventure!
Indeed, additional attention to your storage method can enhance your hat’s lifespan. You might want to consider the following:
- Store it away from direct sunlight to prevent fading.
- Consider using silica gel packets in the storage area to manage moisture.
- Regularly inspect for any signs of wear or damage.
This ensures that your beloved crochet knight hat is ready for use whenever you need it!
Final Words
Hence, by following this free crochet knight hat pattern, you can create a unique and engaging accessory for yourself or your loved ones. This project not only allows you to showcase your crochet skills but also provides a wonderful way to inspire creativity and imagination. As you take on this crafting challenge, you’ll find joy in every stitch and a sense of accomplishment once the hat is complete. Embrace your creativity and enjoy the process of bringing your knight hat to life!
Download Free Crochet Knight Hat Pattern
To get Free Crochet Knight Hat Pattern ideas and stuff, check out the gallery of them below: