Free Crochet Horse Blanket Pattern – With this free crochet horse blanket pattern, you have the opportunity to create a stunning and functional accessory for your equine friend. Crocheting a blanket not only provides warmth and comfort for your horse during colder months but also allows you to personalize it with your choice of colors and designs. This guide will walk you through the imperative steps and materials needed to complete your project, ensuring that you have all the information required to craft a beautiful and warm blanket that your horse will love.
Key Takeaways:
- Thoroughly review the pattern before starting to ensure you understand the required stitches and techniques, as some patterns may include specific instructions for sizing and adjustments.
- Choose appropriate yarn and hook size to achieve the desired texture and warmth for the blanket, keeping in mind the horse’s comfort and the durability needed for outdoor use.
- Consider adding personalization options, such as colors or monograms, to make the blanket unique and reflect your style or your horse’s personality.
Materials Needed
The materials you will need for this crochet horse blanket pattern include yarn, a crochet hook, scissors, and a yarn needle. Selecting the right yarn will ensure your blanket is both durable and comfortable for your horse. Having the correct tools on hand will set the foundation for a successful crocheting experience.
Yarn Selection
At the heart of your project is the yarn you choose. Opt for a durable, weather-resistant yarn that will withstand the elements and provide comfort for your horse. Look for fibers that are easy to clean and maintain, ensuring your blanket remains in excellent condition for years to come.
Crochet Hook Size
After selecting your yarn, the next step is to choose the right crochet hook size. Typically, a hook size between H (5.0 mm) and J (6.0 mm) works well for horse blankets. This size will allow you to create a fabric that is both sturdy and flexible, perfect for withstanding wear and tear.
Hence, the choice of crochet hook size significantly impacts your project. Using a larger hook may create a looser fabric, which could lead to fraying over time, while a smaller hook might make the blanket too stiff. Finding the right balance will enhance your crafting experience and result in a more durable finished product. Regularly checking your tension as you crochet will help you maintain consistency throughout your blanket. This attention to detail should ensure a better fit for your horse and a blanket that holds up well against the rigors of outdoor use.
![]()
Gauge and Sizing
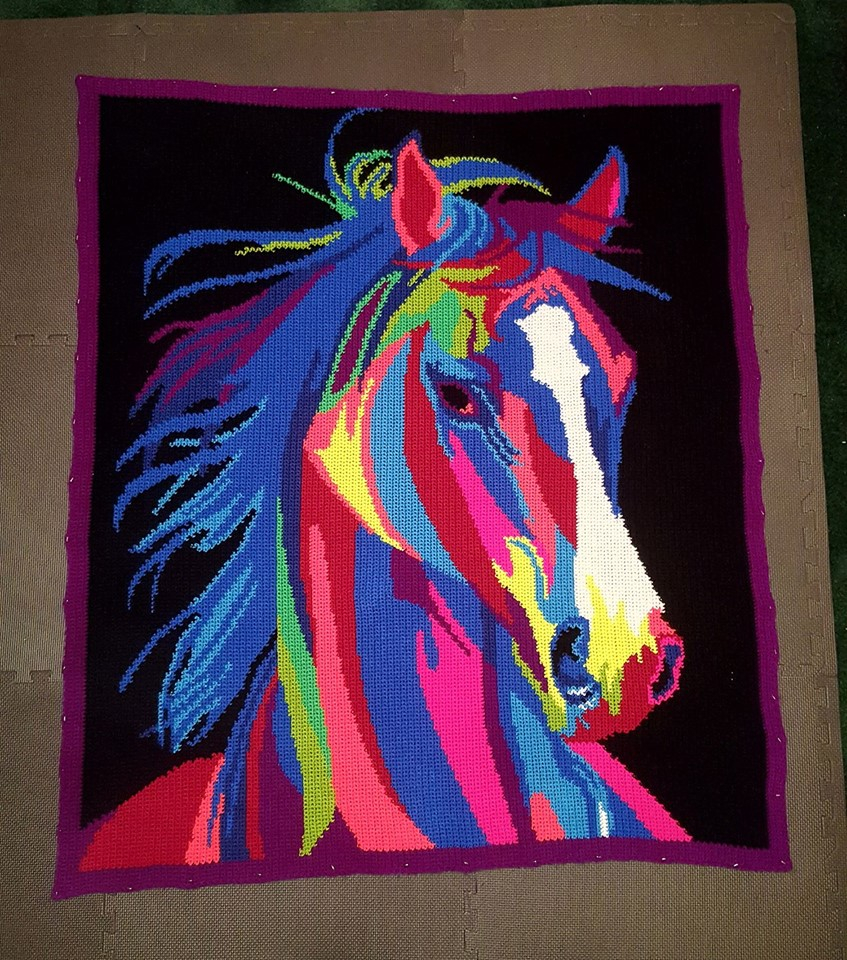
Some factors play a role in achieving the correct gauge and sizing for your horse blanket. Fine-tuning your gauge ensures your final product meets the desired dimensions. It’s advisable to consult the Filet Crochet Horse Afghan Pattern for guidance on stitch counts and measurements that match varying horse sizes.
Measuring Your Horse
Before you start crocheting your horse blanket, you need to accurately measure your horse. Use a measuring tape to determine the length of your horse from the withers to the tail, as well as the width across the back. Taking these measurements will allow you to create a blanket that fits snugly, providing warmth without restricting movement.
Adjusting Pattern Size
One way to ensure your horse blanket fits perfectly is by adjusting the pattern size. You can increase or decrease the number of stitches and rows based on your horse’s measurements.
At this stage, assess the initial gauge you’ve achieved and compare it to the measurements you took. If your gauge is larger than what the pattern calls for, you may need to decrease stitches or rows to prevent a loose fit. Conversely, if your gauge is smaller, you’ll want to add more stitches or rows to ensure the blanket provides adequate coverage. This level of customization enables you to create a horse blanket that is not only cozy but also tailored specifically for your horse’s comfort and needs.
Crochet Techniques
Now that you’re ready to create your Crochet Horse Blanket, it’s important to understand the various crochet techniques that will enhance your skill set. Mastering these techniques will not only make your blanket more visually appealing but also provide you with a durable and cozy finished product. Get comfortable with the standard crochet practices to ensure your project is a success!
Basic Stitches
With basic stitches like chain stitch, single crochet, and double crochet, you’ll form the foundation of your horse blanket. These fundamental techniques are simple yet effective, allowing you to build your project step-by-step. Practicing these stitches will ensure you have a sturdy and even base for your crochet work.
Special Stitches for the Blanket
Along with basic stitches, incorporating special stitches adds texture and flair to your crochet horse blanket. Techniques like half double crochet or popcorn stitches can elevate your blanket’s design, making it unique and eye-catching. You’ll want to include these stitches for added dimension throughout your project.
Plus, using special stitches can significantly enhance the overall structure of your blanket. These stitches not only provide visual interest but also contribute to the blanket’s warmth and durability. Employing varied techniques like shells and granny squares lets you personalize your design while ensuring it’s safe for your horse as well as comfortable for them to use. Embrace these unique crochet techniques to create a one-of-a-kind masterpiece that both you and your horse will love!
Step-by-Step Instructions
Once again, you’ll find that making this crochet horse blanket becomes enjoyable as you work through the process. Follow the detailed guidance below to ensure a seamless experience from start to finish.
| Steps | Details |
| Gather Your Materials | Choose the right yarn and hooks to suit your blanket style. |
| Start the Foundation | Begin with a foundation chain that aligns with your desired size. |
| Work Your Rows | Follow the pattern to create the body of the blanket, using stitches as specified. |
| Prepare for Edging | Add final touches with a border to enhance durability. |
Starting the Blanket
Before you explore creating your horse blanket, ensure you have all the necessary materials at hand. This includes your yarn, crochet hook, and a pair of scissors. Starting with a foundation chain is crucial, as it sets the size and width of your blanket, which can be adjusted based on your preferences.
Completing the Blanket
On the final stages of your project, you’ll be working on the edging and ensuring that everything is neatly finished. Pay attention to every detail, as this is where you give your blanket its final touch.
Also, it’s important to double-check for any loose ends or uneven stitches while you’re adding the edging. This final step enhances the aesthetic appeal of your blanket, and you want to ensure a smooth and polished look. Investing a little time here can make a significant difference. Don’t forget to weave in all the ends securely; this ensures your blanket remains durable and ready for use! Happy crocheting!
Finishing Touches
To give your crochet horse blanket a polished look, it’s vital to focus on the finishing touches. This is where you can elevate your project through careful detailing, ensuring that every part of your creation reflects your effort and style. A well-finished blanket will not only look professional but also provide extra comfort and durability for your horse.
Adding Edging
Above all, adding a decorative edging can transform the overall appearance of your blanket. Choose a stitch that complements your design, whether it’s a simple single crochet or a more intricate shell stitch. Ensure that you evenly space your edges for a uniform finish, which will enhance both aesthetics and strength.
Blocking the Blanket
Edging your horse blanket isn’t the last step; blocking is equally important for achieving a neat finish. Blocking involves dampening your crochet piece and shaping it to the desired dimensions before letting it dry. This process helps to smooth out any uneven stitches and imperfections, enhancing the blanket’s overall appearance. After blocking, you’ll notice that your project has a sharper, more defined look, and the blanket will drape beautifully on your horse. Always work on a clean, flat surface for the best results, allowing your hard work to shine through.
Blocking is a fantastic technique that ensures your final blanket is not only visually appealing but also structurally sound. When you dampen the blanket, it’s vital to lay it out flat and pin the edges to maintain the desired shape. This step can help prevent future curling or warping, allowing your blanket to last longer. As it dries, the fibers will set into place, making your crochet masterpiece look tailored. Just be sure to follow any fiber care instructions to avoid unwanted shrinking or damage during the blocking process.
Care and Maintenance
Your crochet horse blanket will serve you and your equine friend well if you take some time for proper care and maintenance. Keeping your blanket clean and storing it correctly will extend its lifespan, ensuring it remains a warm and cozy companion through the seasons. Regular checks for wear and tear can also help you catch any issues early, keeping your horse safe and comfortable.
Washing Instructions
Washing your crochet horse blanket is straightforward. You should use a gentle cycle in cold water with mild detergent to prevent damage to the fibers. Avoid bleach or fabric softeners, as they can compromise the blanket’s integrity. Always air dry your blanket, as heat from a dryer can warp or shrink the crochet stitches.
Storing the Blanket
Before storing your blanket, ensure it is completely clean and dry to prevent mildew or pests. Fold it neatly and place it in a breathable storage bag or container. Keep it in a cool, dry area away from direct sunlight to protect the colors and fibers.
In fact, proper storage is necessary for maintaining the quality of your crochet horse blanket. Keeping it in a damp-free and ventilated space will discourage mold and protect against pests that might find it an inviting place to nest. Consider adding cedar chips or lavender sachets to deter any unwanted insects. By taking these precautions, you’ll ensure your blanket remains vibrant, intact, and ready for use whenever you need it.
Summing up
Presently, by utilizing the free crochet horse blanket pattern, you can create a functional and stylish accessory for your horse that showcases your crafting skills. This pattern is designed to be both approachable and versatile, allowing you to customize the size and colors to match your horse’s personality. As you launch on this project, you’ll not only enjoy the process but also produce a valuable item that enhances your horse’s comfort and style. Happy crocheting!
FAQ
Q: What materials do I need for the Free Crochet Horse Blanket Pattern?
A: To complete the Free Crochet Horse Blanket Pattern, you’ll need the following materials: various skeins of yarn in your chosen colors (preferably medium-weight yarn for durability), a crochet hook (size will depend on your yarn choice; typically a 5mm or H hook works well), scissors, a yarn needle for finishing, and a measuring tape to ensure you achieve the correct dimensions. It’s also helpful to have stitch markers if you want to keep your place in the pattern.
Q: Is the Free Crochet Horse Blanket Pattern suitable for beginners?
A: Yes, the Free Crochet Horse Blanket Pattern is designed with beginners in mind. The instructions are clear and straightforward, making it easy for those new to crochet to follow along. It incorporates basic crochet stitches, and while some experience may be helpful, the pattern can be completed by anyone who is willing to learn and practice the basic techniques. Additionally, there are many online tutorials and videos that can aid beginners in understanding the stitches required.
Q: Can I modify the Free Crochet Horse Blanket Pattern to fit different sizes?
A: Absolutely! The Free Crochet Horse Blanket Pattern can be easily modified to fit different sizes, whether you need a smaller blanket for a pony or a larger one for a draft horse. To adjust the size, simply increase or decrease the starting chain length while keeping in mind the stitch multiples required for the pattern. Make sure to measure your horse or target dimensions before starting to ensure the final product meets your needs. Additionally, you can experiment with different yarn weights or stitch patterns to personalize your blanket further.
Download Free Crochet Horse Blanket Pattern
To get Free Crochet Horse Blanket Pattern ideas and stuff, check out the gallery of them below: