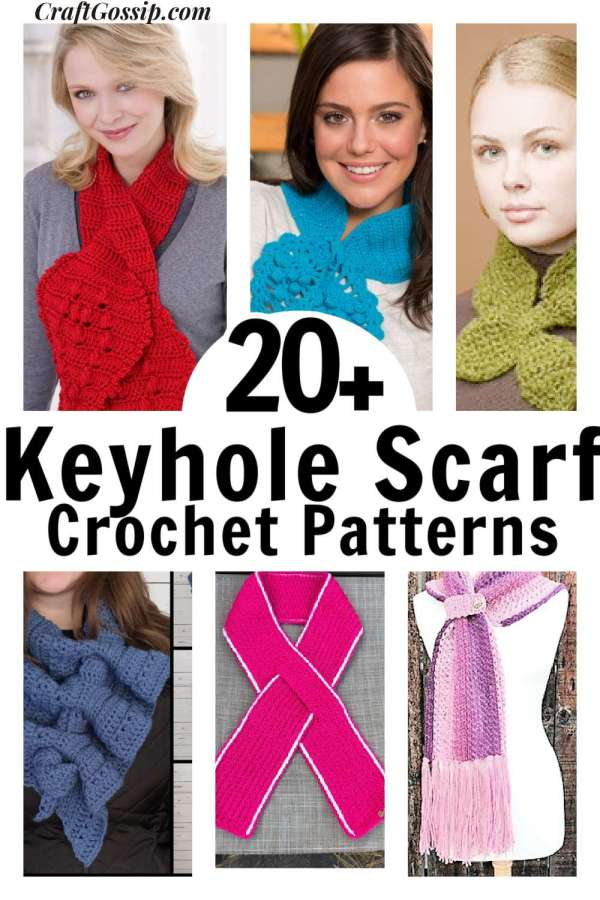
It’s time to enhance your crochet skills with a delightful and practical accessory: the keyhole scarf. In this blog post, you will discover a free pattern that not only adds style to your wardrobe but also provides warmth and comfort during colder months. This easy-to-follow design is perfect for both beginners and seasoned crocheters, as it incorporates simple stitches and techniques. Join us as you launch on crafting your very own keyhole scarf, and transform your crochet experience into a creative journey!
Materials Needed
For your crochet keyhole scarf project, you’ll need a few crucial materials to ensure you’re fully prepared. Gather your favorite yarn, suitable crochet hooks, scissors, and a yarn needle for finishing touches. Choosing the right materials will make your scarf not only beautiful but also comfortable and functional.
Yarn Selection
To achieve the best results, choose a soft yarn that provides warmth and comfort. A medium-weight yarn, such as Worsted or Bulky, is perfect for this project, allowing for a cozy yet versatile scarf that suits any wardrobe.
Recommended Crochet Hooks
After selecting your yarn, it’s time to choose the right crochet hook to match its thickness and texture. A hook size ranging from H (5.0 mm) to J (6.0 mm) is commonly recommended, but you may adjust the size based on your tension and the yarn you select.
Consequently, selecting the appropriate hook size ensures that your stitches are uniform and your project progresses smoothly. Using a hook that’s too small may result in a tight, difficult-to-work piece, while one that’s too large could lead to loose stitches. When in doubt, test your tension with a swatch to find the ideal match for your yarn and working style.
Stitches Used
There’s a delightful variety of stitches involved in crafting your keyhole scarf, allowing you to explore your crochet skills while creating an elegant piece. You’ll utilize basic foundation stitches to build your scarf, along with some special techniques that add rhythm and texture, making the finished project truly unique.
Basic Stitches
Across your work, you’ll primarily use chain stitches, slip stitches, single crochets, and double crochets. These fundamental stitches form the backbone of your keyhole scarf, providing structure and stability as you progress through the pattern. Mastering these stitches will help you achieve beautiful and consistent results.
Special Stitches
Behind your basic techniques, you’ll also incorporate various special stitches that enhance the scarf’s design. These stitches can include puff stitches, shell stitches, or even textured stitches, depending on your personalized flair. By blending these stitches, your keyhole scarf will showcase beautiful patterns and depth.
Used in your scarf, special stitches give it visual intrigue and tactile pleasure, making the project more enjoyable for you to create. Experimenting with them allows you to customize your scarf, providing unique texture and style that speak to your personal taste. Don’t hesitate to try different combinations; the more you explore, the more fun and rewarding your crochet experience will be!
Scarf Dimensions
Some necessary details about your keyhole scarf dimensions can enhance your overall design. Typically, a keyhole scarf is designed to provide warmth and style, with a comfortable fit for various neck sizes. When creating your scarf, it’s important to keep your personal preference in mind, as well as the type of yarn used, which may affect the final measurements.
Recommended Size
Around 6 to 8 inches in width and 60 to 70 inches in length is generally a well-suited size for your keyhole scarf. This gives enough fabric to wrap around your neck comfortably while allowing for flexibility in styling. Adjust these measurements based on your specific needs and preferences.
Customizing Length
Length is another factor you can adjust to achieve your ideal scarf. Depending on your style and intended warmth, you might prefer a longer or shorter scarf. A longer scarf can be wrapped multiple times for extra coziness, while a shorter option may be more suitable for a chic, layered look.
With a few simple adjustments, you can customize the length of your keyhole scarf to suit your style perfectly. Consider how you typically wear scarves and what functionality you want from your design. If you prefer a warm neck wrap, aim for a longer length, while a sleek, minimalist look might benefit from a shorter scarf. Take your time to find your ideal dimensions, ensuring that the final product meets your personal taste and comfort level.
Step-by-Step Instructions
Despite the simplicity of this design, the delicate details will elevate your crochet skill. Follow the step-by-step instructions outlined below to successfully create your keyhole scarf.
| Instructions | Details |
|---|---|
| Starting the Scarf | Begin with a foundation chain of your desired length, typically around 40 inches. |
| Creating the Keyhole | Work a designated section to form the keyhole, using double crochet stitches. |
| Finishing Touches | Weave in any loose ends and block your scarf for a polished finish. |
Starting the Scarf
Behind the initial chain, you will lay the foundation for your scarf. Use a soft yarn in your favorite color and start by chaining the required number of stitches. This will give you the width you desire, providing a cozy fit around your neck.
Creating the Keyhole
With this step, you’ll be shaping the crucial aspect of your scarf. You’ll work on a section where you will create an opening or keyhole. This is typically done using double crochet stitches which not only provide a unique design but also ensure that your scarf stays secure when worn.
But, as you move through these stitches, take care to keep your tension even for a smooth finish. The keyhole portion will form a loop for the scarf, allowing you to pull one end through to secure it around your neck comfortably. This adds both functionality and style to your finished piece.
Finishing Touches
For the final touches, take your time to ensure a clean and professional look. Weave in any loose ends using a yarn needle, and don’t skip the blocking—this will help your scarf maintain its shape and drape beautifully.
This final step can really enhance the appearance of your crochet keyhole scarf. By blocking it, you will not only achieve a neater finish, but also allow the stitched texture to shine, making your scarf an eye-catching accessory. Enjoy wearing or gifting your new creation!
Tips for Success
Not every project goes as planned, but with these tips, you can pave the way for a successful crochet keyhole scarf:
- Choose the right yarn for warmth and texture.
- Maintain consistent tension throughout the project.
- Use stitch markers to keep track of your pattern.
- Practice the keyhole technique with swatches before starting.
Knowing these tips can significantly enhance your crochet experience, helping you create a beautiful scarf you’ll cherish.
Troubleshooting Common Issues
Success in crochet often comes down to identifying and resolving common issues. If you find your scarf curling, check your stitch tension; loosening or tightening your stitches can help. If the keyhole is too tight, consider adjusting the pattern or using a larger hook. Lastly, if your yarn is snagging, switching to a smoother yarn may alleviate frustration.
Enhancements and Variations
The possibilities are endless when it comes to enhancing your crochet keyhole scarf. You can experiment with different yarn weights and textures, try colorful variegated yarn, or incorporate unique stitches like bobbles or shells for a more intricate design.
A great way to personalize your scarf is by adding fringes, embroidery, or lace detailing around the edges. Consider using a different color scheme or alternating yarn types for a striking effect. You can also adjust the size of your keyhole for wearability and comfort. With these enhancements, you can create a truly unique accessory that highlights your personal style!
Care Instructions
After you’ve created your beautiful crochet keyhole scarf, it’s necessary to give it the proper care to ensure it lasts for years to come. Following a few simple care instructions will keep your scarf looking brand new and ready to wear with any outfit.
Washing and Drying
The best way to wash your scarf is by hand in cool water with a gentle detergent. Avoid wringing or twisting the fabric; instead, gently press out excess water. Lay it flat on a clean towel to dry, reshaping it as necessary, and keep it away from direct sunlight to maintain its color.
Storing Your Scarf
On storing your scarf, choose a cool, dry place where it won’t be squashed or crumpled. Folding it neatly or using a scarf hanger can help prevent any unwanted creases or stretching.
This approach not only keeps your scarf in shape but also protects it from dust and potential damage. If you have multiple scarves, organizing them in a designated drawer or using a decorative box can enhance both accessibility and protection. Ensuring proper storage will help you enjoy your scarf for many seasons ahead.
Final Words
The Crochet Keyhole Scarf pattern offers an enjoyable and straightforward project that enhances your skill set while providing a practical accessory. By following the free pattern, you can create a stylish and functional piece to keep you warm during colder months. Your choice of yarn and colors allows for personal expression, making this scarf a wonderful addition to your wardrobe or a heartfelt gift for someone special. Dive into this project and enjoy the rewarding experience of crafting a beautiful keyhole scarf that you can cherish for years to come.
Download Crochet Keyhole Scarf Pattern Free
To get Crochet Keyhole Scarf Pattern Free ideas and stuff, check out the gallery of them below: