Pattern enthusiasts will delight in this Bumble Bee Crochet Hat Pattern, designed specifically for you to create a charming accessory that brings a touch of whimsy to any outfit. This free pattern is beginner-friendly and includes step-by-step instructions, allowing you to showcase your crochet skills and creativity. With just a few materials and a little time, you can whip up a cute hat that’s perfect for kids and adults alike. Get ready to buzz with excitement as you bring this adorable design to life!
Materials Needed
Before you begin your Bumble Bee Crochet Hat project, gather all the necessary materials to make the process smooth and enjoyable. You’ll need a selection of yarn in black, yellow, and white, crochet hooks in suitable sizes, and additional tools such as scissors and a yarn needle to tie off loose ends. Having everything prepared will keep you focused on your creative work, allowing you to probe the fun of crochet without unnecessary interruptions.
Yarn Selection
Against using just any yarn, it’s important to pick a soft, durable yarn that will feel good against the skin, especially for a hat. A lightweight worsted yarn or a cotton blend can add both comfort and warmth, making your finished project perfect for any child or adult. Opt for colors that mimic the classic bumblebee look to truly capture the spirit of your hat.
Crochet Hooks and Tools
Across the world of crochet, the right tools can enhance your crafting experience. Opt for an ergonomic crochet hook to help reduce strain in your hands while working for longer periods. Consider using a stitch marker to keep your place, along with scissors for trimming your yarn, and a tapestry needle for weaving in the ends. These simple tools will make your project more enjoyable and efficient.
Hooks are your primary tool for creating textures and defining shapes in your crochet hat. Using the correct size hook, usually recommended on your yarn label, ensures that your stitches are uniform and your hat maintains its shape. An ergonomic option allows you to crochet with ease, minimizing hand fatigue. Furthermore, having a stitch marker on hand can help you track your progress, ensuring that you don’t lose your place in the pattern. Investing in quality tools will significantly enhance your crocheting experience.
Stitches Used
Some important stitches will guide you through the Bumble Bee Crochet Hat pattern. Mastering these stitches will ensure a beautiful and structured finish, making your project enjoyable and rewarding.
Basic Stitches
For this pattern, you will primarily use basic stitches such as chain stitches, single crochet, and double crochet. These stitches form the foundation of your work and are simple enough for beginners while also versatile enough for experienced crocheters.
Special Stitches
Any crochet project can benefit from special stitches that add texture and detail. In this Bumble Bee Hat pattern, you’ll encounter the bobble stitch and slip stitch, which enhance the hat’s design and create charming features that resemble a bumblebee.
Stitches like the bobble stitch create a fun, textured effect that adds dimension to your hat, reminiscent of a bumblebee’s fluffy body. The slip stitch serves to join rounds seamlessly, providing a professional finish to your project. By incorporating these special stitches, you not only elevate your hat’s visual appeal but also explore different techniques that expand your crochet skills.
Sizing and Fit
The Bumble Bee hat is designed to fit snugly while providing comfort and warmth. To achieve the perfect fit, you’ll want to consider the measurements of the head for which you’re creating the hat. Whether you’re crocheting for a child or yourself, it’s important to choose the right size to ensure the hat sits just snug enough without being too tight. Adjust your crochet tension if necessary, and check your gauge to help create a hat that will fit beautifully.
Size Chart
One of the best ways to determine the right size for your Bumble Bee hat is by referring to the size chart that accompanies the pattern. This chart provides measurements for different age groups, from infants to adults, allowing you to easily select the appropriate dimensions for your project. By using this guide, you can feel confident that you are making a hat that fits well and looks great.
Adjusting for Different Sizes
Below is a handy guide to help you adapt the pattern for various sizes if you need something outside the size chart. You can make simple adjustments, such as changing the number of stitches or altering the number of rows, to customize the fit based on head circumference and desired style. Don’t hesitate to get creative with the pattern to suit your needs!
In fact, adjusting the Bumble Bee hat for different sizes is a straightforward process. If you find your measurements fall outside the standard size chart, you can increase or decrease the chain stitches at the beginning of the pattern or modify the stitch count in the body of the hat. Simply ensure that your adjustments maintain the overall structure and design of the bee theme. By following these steps, you can craft a hat that perfectly fits the head it’s intended for, whether making it for yourself or a loved one.
Crochet Pattern Instructions
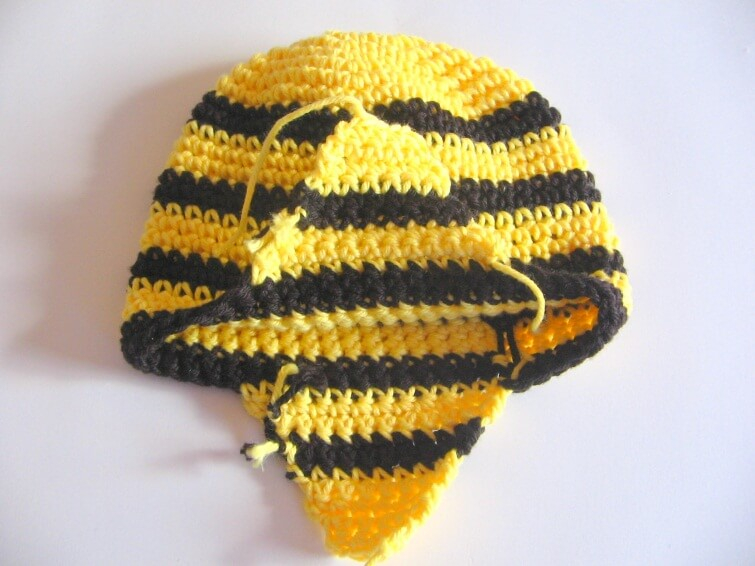
Not only is this Bumble Bee Crochet Hat adorable, but it’s also simple to follow. Begin by creating a magic ring, then work in rounds for the body of the hat, alternating between yellow and black yarn to mimic the stripes of a bumblebee. Use double crochet stitches for a cozy texture, and don’t forget to incorporate decreases at the top to shape the hat. Follow the detailed pattern carefully, and soon, you’ll have a charming hat that showcases your crochet skills.
Assembly Instructions
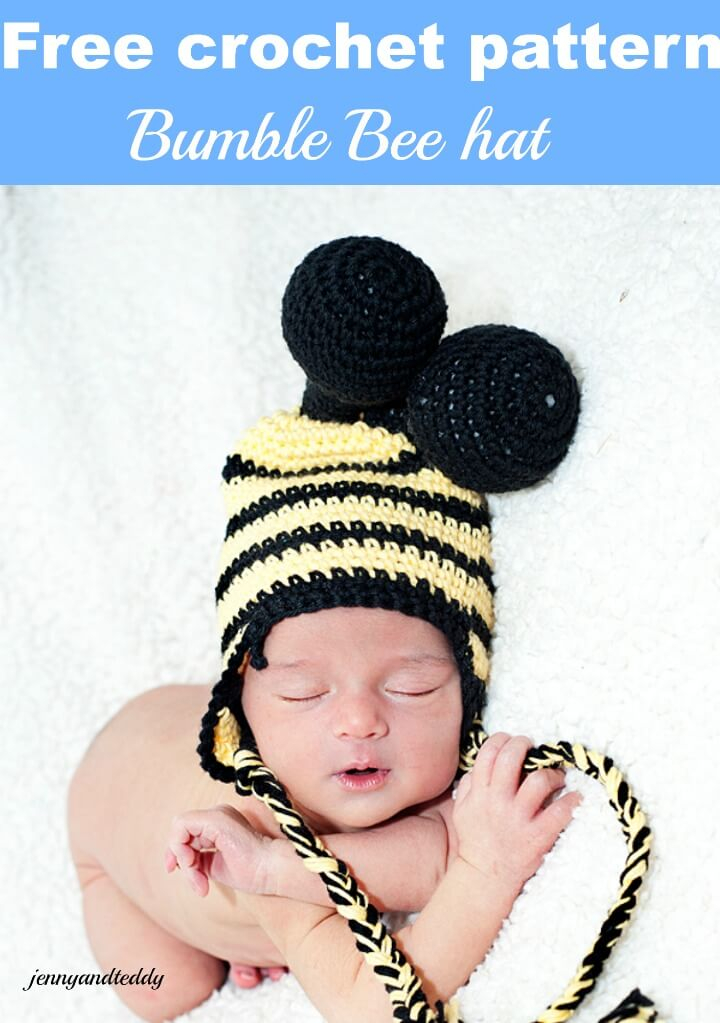
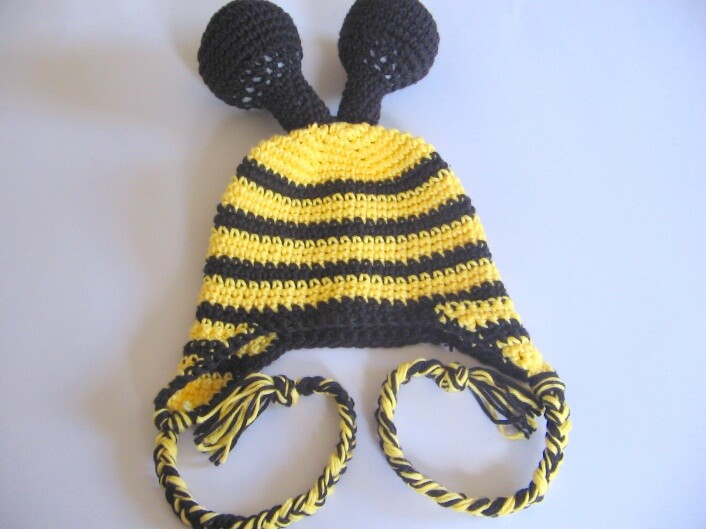
At this stage, you’ll start bringing your bumble bee hat to life. After finishing the hat body, attach the bee wings using slip stitches or whip stitches. Position them symmetrically on either side of the hat for an even look. If you crafted antennae, securely stitch them to the top of the hat. Take your time to ensure everything is aligned, contributing to the overall cuteness of your creation.
Finishing Touches
One of the keys to making your Bumble Bee Crochet Hat really shine is adding the final details. Once the assembly is complete, weave in any loose ends with a tapestry needle for a polished finish. You can also add embellishments like buttons or safety eyes to give your bee character. For a playful touch, consider adding a crochet flower or a pom-pom to the top of the hat.
With these finishing touches in mind, think about personalizing your hat to make it unique. You can alter the colors to match your style or add additional decor items, like sewn-on felt shapes or embroidery for extra flair. The options are endless, allowing you to express your creativity while wearing your delightful bumblebee hat proudly!
Troubleshooting Common Issues
Keep this troubleshooting guide handy while you work on your Bumble Bee Crochet Hat. It will help you address any common issues that may arise, ensuring that your project turns out beautifully. From gauge inconsistencies to making adjustments in the pattern, having solutions at your fingertips can make all the difference in your crocheting experience.
Gauge Problems
Common issues with gauge can lead to a hat that doesn’t fit properly. If your stitches are too tight or too loose, it may affect the overall size of your Bumble Bee Hat. Always check your gauge against the pattern before starting, and be prepared to make adjustments as needed to achieve the desired fit.
Pattern Adjustments
Behind a perfect fit often lies the need for pattern adjustments. If your initial gauge swatch shows significant discrepancies from the recommended measurements, you may need to modify your hook size or yarn choice. These adjustments can help you achieve the correct dimensions for your Bumble Bee Crochet Hat.
Gauge plays an crucial role in pattern adjustments. If your swatch is larger than specified, try using a smaller hook or a yarn with a different weight. Conversely, if your swatch is smaller, switch to a larger hook or thicker yarn. Don’t hesitate to tweak the number of stitches or rows as well, ensuring that the final product meets your specific sizing needs.
Tips for Personalization
To make your Bumble Bee crochet hat uniquely yours, consider personalizing it with these suggestions:
- Add initials or a name tag.
Perceiving how these small additions can transform your hat will make your project even more special.
Color Variations
For a fresh take on the classic Bumble Bee design, experiment with color variations. Instead of the traditional yellow and black, try using pastel shades, neon colors, or even a gradient effect. Play around with color blocking or add stripes to make your hat stand out even more.
Embellishments
Around the hat, adding embellishments can elevate your crochet creation. Consider sewing on pom-poms, attaching cute felt wings, or adding crochet flowers for a spring vibe. The options are endless, and these accents can provide an extra touch of personality.
It’s important to choose embellishments that match your style and the season. You might adorn the hat with a whimsical flower for a sunny look or sport cozy earflaps with playful tassels for winter. Don’t hesitate to mix and match elements—this will reflect your creativity and make the hat truly yours.
Summing up
On the whole, the Bumble Bee Crochet Hat Pattern offers you a delightful and whimsical way to express your creativity while keeping warm. With a variety of designs available for free, you can easily find a pattern that suits your skill level and personal style. By following the instructions carefully, you’ll create a charming piece that showcases your crochet talents. So, gather your materials and get started on this fun project that’s sure to bring joy to you and others, making it a fantastic addition to your crochet repertoire.
Download Bumble Bee Crochet Hat Pattern Free
To get Bumble Bee Crochet Hat Pattern Free ideas and stuff, check out the gallery of them below: